

Introduction
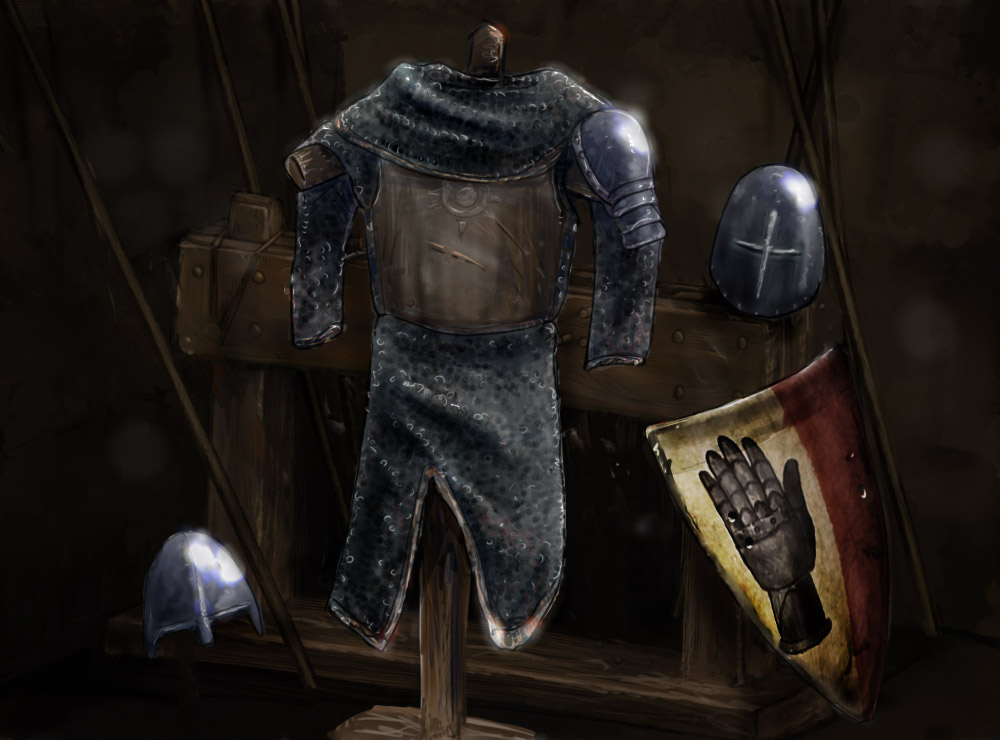
Armor is a layered protection system shaped by material, proficiency, and the type of threat you expect to face.
Armor reduces incoming damage through Damage Reduction (DR). When a hit lands, DR is subtracted from raw damage before it reaches the target. With hit point pools kept deliberately low, good armor is a primary survival tool — not a supplement to HP but an alternative to losing it.
Armor is built in layers. Each layer sits on top of the last, and their DR values stack at each body location. A character in mail over a gambeson over a linen shirt has three layers of DR on their torso — each contributing its value to the total absorbed before damage lands.
Heavier armor costs more than gold. It slows movement, drains fatigue faster, and demands proficiency to wear effectively. Non-proficient wearers pay a penalty in both fatigue and movement — they can still wear it, but the cost mounts quickly in a long fight.
Story Lens
The Weight of Protection
Coverage is explicit. What you do not protect can still be reached.
Armor in this system reduces damage through Damage Reduction (DR). When a hit lands, DR is subtracted from the raw damage before it is applied to the target. DR is not absolute — a sufficiently powerful blow will still deal damage — but against typical combat threats, layered armor changes the outcome of a fight.
Armor is organised into layers numbered 0 through 5, plus add-ons and shields. Each layer represents a different class of protection. Layers stack additively when worn together, and each layer can only contribute one piece per body location.
Each armor piece covers specific body locations. DR only reduces damage dealt to a covered location. A blow that targets an exposed location ignores armor entirely.
- Each armor piece applies its DR to a specific body location — coverage is explicit, not assumed.
- Layers stack within rules: underlayer, padding, leather, mail, composite, and plate each contribute their DR.
- Sunder tracks structural integrity — a piece that takes enough punishment degrades and eventually fails.
- Proficiency determines how efficiently you carry the weight.
How Armor Works
Armor reduces damage through DR, degrades through sunder, and creates pressure through fatigue and movement costs.
The Basics
Five operating principles cover how armor layers, stacks, degrades, costs, and requires proficiency.
- One piece per layer per location: you cannot wear two breastplates on the same body location, but you can layer different categories on one location and plate on different locations.
- Damage Reduction stacks: the DR of every piece covering a location is summed and subtracted from incoming damage at that location.
- Sunder tracks degradation: the outermost piece on a hit location absorbs the blow. Excess damage beyond that piece's DR drains its sunder pool. When the pool empties the piece loses 1 DR permanently. When DR reaches 0 the piece is destroyed.
- Proficiency determines cost: wearing armor outside your proficiency tier adds fatigue every round and drops your movement to the next tier down, with a minimum of ×0.5 base movement.
- Coverage is explicit: DR only applies to locations the piece actually covers. Exposed locations receive no reduction.
How Armor Works
Armor in OpenRPG is built from underlayers upward, combining damage reduction, sunder, and encumbrance into a layered system.
Protection in OpenRPG is built from the ground up. Start with basic cloth underlayers, add quilted padding, then layer on leather, mail, composite, or plate depending on budget, need, and proficiency. Each layer adds its DR to the total — more layers means more protection at each location.
Armor is organized into three proficiency tiers — Light, Medium, and Heavy — each unlocking a wider set of layers. Wearing armor within your proficiency tier costs nothing beyond the weight. Exceeding it adds fatigue pressure and reduces movement.
Each armor piece has a sunder pool that tracks structural integrity. The outermost piece on a struck location takes the hit. When raw damage exceeds that piece's individual DR, the excess drains the sunder pool. A depleted pool means a permanently degraded piece. Repair restores the pool; only a craftsman can restore lost DR.
Layer Reference
The layer system defines what armor can be worn together, what DR each layer contributes, and how pieces stack.
Every armor piece belongs to a layer. Layers are numbered so that outer layers sit on top of inner ones. Each layer can only contribute one piece per body location. DR values are per piece — total DR at a location is the sum of all pieces covering it.
| Layer # | Category | DR range | Sunder pool | Can stack? | Examples |
|---|---|---|---|---|---|
| 0 | Underlayer | 1 | 3 | Yes | Linen shirt, wool hose, braies |
| 1 | Padding | 2 | 5 | Yes | Gambeson, arming doublet, padded coif |
| 2 | Leather | 3 | 6 | Yes | Leather cuirass, bracers, leather greaves |
| 3 | 4–5 | 10 | Yes | Mail hauberk, mail coif, mail chausses | |
| 4 | Composite | 5–6 | 12 | Yes | Scale, lamellar, brigandine |
| 5 | Plate | 6–8 | 15 | No — one plate piece per location | Breastplate, vambraces, greaves, great helm |
| –1 | Add-on | 1–3 | 4–8 | Yes — fills gaps only | Gorget, pauldrons, knee cops |
Plate restriction
Plate armor does not stack with other plate pieces at the same body location. A character can wear one plate piece per location. Wearing a breastplate and a full plate harness on the torso simultaneously is not possible — the harness already covers the torso completely. Plate from different locations (chest and legs, for example) is fine.
Layer Overrides & Special Cases
Not every armor piece fits neatly into its default category, so some pieces intentionally override the normal layer progression.
| Armor Piece | Category | Override Layer | Reason |
|---|---|---|---|
| Heavy Gambeson | Padding | Layer 2 | Thick enough to function as standalone armor rather than a pure underlayer. |
| Studded Leather | Leather | Layer 3 | Metal reinforcement pushes it toward composite-level protection. |
| Reinforced Brigandine | Composite | Layer 5 | Internal plates are heavy enough to qualify as true plate armor. |
| Ceremonial Plate | Plate | Layer 3 | Thin, decorative metal worn for status rather than real plate-level protection. |
Damage Reduction
DR is summed across all worn layers for each body location and subtracted from incoming damage. The outermost piece tracks sunder independently.
When a character is struck, identify the body location hit. Sum the DR of every armor piece covering that location. Subtract the total from raw damage — the remainder is dealt as actual damage. If total DR equals or exceeds the raw damage, no damage gets through.
Separately, the outermost piece on the hit location takes a sunder check. The outermost piece is the highest-numbered layer covering that location. If raw damage exceeds that piece's individual DR, the excess drains the piece's sunder pool.
Example
A fighter wears a linen shirt (DR 1, Torso), a gambeson (DR 2, Torso), mail hauberk (DR 5, Torso), and a breastplate (DR 7, Torso). Total torso DR = 15. A sword blow deals 12 damage — fully absorbed, 0 damage gets through. The breastplate (outermost, DR 7) takes the sunder check. Raw damage 12 exceeds the breastplate's DR 7 by 5, so 5 is subtracted from the breastplate's sunder pool (15 → 10).
Sunder mechanic
Each armor piece has a sunder pool representing its structural integrity. The pool drains when the piece absorbs more than its individual DR can handle. A depleted pool means the piece has been pushed past its limit.
| Event | Effect |
|---|---|
| Raw damage exceeds outermost piece's DR | Excess damage (raw − piece DR) drains the piece's sunder pool. |
| Sunder pool reaches 0 | Piece loses 1 DR permanently. Sunder pool resets to half its maximum. |
| Piece DR reaches 0 | Piece is destroyed and provides no further protection. |
| Field repair (short rest, no tools required) | Sunder pool restored to half maximum. Lost DR is not recovered. |
| Proper repair (armourer, town) | Sunder pool fully restored. Lost DR fully recovered. |
- Only the outermost piece sunders per hit — inner layers are protected by what sits above them.
- If the outermost piece is destroyed, the next layer becomes the outermost and takes future sunder checks.
- A piece at reduced DR still contributes its remaining DR to the total — it is degraded, not gone.
- Multiple blows in the same fight can push a piece through multiple degradations if they drain the sunder pool repeatedly.
Damage-Type Interaction
Armor choice matters because materials blunt some threats well and fail badly against others.
| Armor Family | Strong Against | Weak Against | Practical Read |
|---|---|---|---|
| Padding / Cloth | Minor cuts, glancing blows, friction, cold | Heavy thrusts, concentrated crushing force, fire | Good first layer and shock absorber, but not enough by itself in brutal fights. |
| Leather | Light cuts, weather, everyday hazards | Heavy thrusts, repeated crushing blows | Flexible and practical, but it does not like spears or hammers. |
| Slashing, many light weapon hits | Bludgeoning, armor-piercing thrusts | Excellent battlefield protection, but it still needs padding and fears crushing force. | |
| Composite / Scale / Brigandine | Mixed battlefield threats, arrows, general cuts | Heavy armor-piercing hits, sustained blunt trauma | Balanced protection when you do not know exactly what is coming. |
| Plate | Cuts, many arrows, incidental impacts | Dedicated anti-armor weapons, grappling pressure, fatigue | The best broad protection, but expensive, exhausting, and not invulnerable. |
GM handling
Use these interactions as the default battlefield logic. When a weapon is explicitly built to pierce armor or a strike lands in a vulnerable gap, favor the weapon. When the blow is broad, glancing, or badly angled, favor the armor.
Donning and Removing Armor
Armor must be donned in layer order and takes time to put on properly. Rushing reduces protection.
Donning armor takes time proportional to its complexity. Lighter layers can be pulled on in minutes; a full plate harness requires an assistant and the better part of an hour. Armor removed in haste is not removed safely — pieces may be damaged or lost.
| Layer | Don time (alone) | Don time (assisted) | Doff time |
|---|---|---|---|
| Underlayer | 1 minute | 1 minute | 1 minute |
| Padding | 5 minutes | 3 minutes | 3 minutes |
| Leather | 5 minutes | 3 minutes | 3 minutes |
| Chainmail | 15 minutes | 10 minutes | 10 minutes |
| Composite | 20 minutes | 10 minutes | 10 minutes |
| Plate | 40 minutes | 15 minutes | 10 minutes |
| Add-ons | 2 minutes | 1 minute | 1 minute |
Layers must be donned in order
You cannot put on a mail shirt without first wearing padding beneath it. Armor worn out of sequence provides its DR but gains the fragility of the layer it sits on — the innermost exposed layer takes all sunder rolls.
Shields
Shields are actively wielded rather than worn, providing DR that can be directed at incoming attacks.
Unlike worn armor, a shield must be actively interposed against an incoming blow. Using a shield is a defense action — the bearer declares a block with the shield and rolls against their Shield skill. On success, the shield's DR applies to that strike.
Shields do not passively stack with worn armor. Their DR only applies on the turn they are actively used to block. A character wearing plate and carrying a tower shield has excellent passive DR from the plate but must spend their defense action to benefit from the shield.
| Shield | DR | Sunder chance | Notes |
|---|---|---|---|
| Buckler | 20 | 28% | Can be used without occupying the off-hand fully. –1 to block rolls vs two-handed weapons. |
| Round Shield | 26 | 22% | Versatile. Standard starting shield for most soldiers. |
| Heater Shield | 26 | 22% | Good mounted and on foot. Favoured by cavalry. |
| Kite Shield | 32 | 18% | Covers legs when standing. Penalty to shield bashes. |
| Tower Shield | 32 | 18% | Can be planted for cover. Requires Strength 60+ to wield without penalty. |
Shield Break
When a shield sunders, check whether the blow exceeded the shield's DR by more than 50%. If so, the shield is destroyed rather than merely damaged and must be replaced.
Proficiency
Armor proficiency is tiered into Light, Medium, and Heavy. Wearing armor outside your tier costs fatigue and reduces movement.
Armor proficiency determines which layers a character can wear efficiently. There are three tiers. Each tier includes all layers up to its ceiling — a character proficient in Medium can wear everything up to and including composite without penalty.
| Tier | Layers included | Categories |
|---|---|---|
| Light | 0–2 | Underlayer, Padding, Leather |
| Medium | 0–4 | Underlayer, Padding, Leather, Mail, Composite |
| Heavy | 0–5 | All layers including Plate |
Fatigue cost
Wearing armor within your proficiency tier costs no additional fatigue beyond the natural heaviness of a long fight. Exceeding your tier adds a passive fatigue drain every round of active combat.
| Situation | Fatigue cost |
|---|---|
| Light armor — proficient | None |
| Medium armor — proficient | +1 per 3 rounds of active combat |
| Heavy armor — proficient | +1 per 2 rounds of active combat |
| Any armor — non-proficient | +1 per round of active combat |
Movement cost
Heavier armor reduces base movement speed. Proficient wearers take a manageable reduction. Non-proficient wearers drop one further tier, with a hard floor of ×0.5.
| Situation | Movement multiplier |
|---|---|
| Unarmored | ×1.0 |
| Light armor — proficient | ×0.9 |
| Medium armor — proficient | ×0.8 |
| Heavy armor — proficient | ×0.65 |
| Light armor — non-proficient | ×0.8 |
| Medium armor — non-proficient | ×0.65 |
| Heavy armor — non-proficient | ×0.5 (minimum) |
- Apply the multiplier to the character's base movement value. A character with base movement 6 in heavy plate (proficient) moves 4 hexes per round.
- Sprint is ×2 of the adjusted base — not ×2 of the unarmored base.
- ×0.5 is the hard floor regardless of additional penalties.
Practical Armor Loadouts
Example loadouts show how the layer system produces recognizable battlefield roles with different DR totals, fatigue costs, and movement profiles.
Light Infantry — "The Conscript"
Basic protection for militia and levies. Cheap, mobile, and sufficient against common threats. No proficiency requirement beyond Light.
| Body part | Layer 0 | Layer 1 | Total DR |
|---|---|---|---|
| Torso | Linen shirt | Quilted gambeson | 3 |
| Arms | — | Gambeson sleeves | 2 |
| Legs | Wool hose | — | 1 |
| Head | — | Padded coif | 2 |
Profile: Light proficiency. Movement ×0.9. No fatigue cost. Torso DR 3 reduces an 8-damage blow to 5 — hurts, but survivable. Good mobility for skirmishing.
Professional Soldier — "The Mercenary"
Balanced protection for experienced fighters. Mail over padding gives strong defense without sacrificing too much mobility. Requires Medium proficiency.
| Body part | Layer 0 | Layer 1 | Layer 3 | Total DR |
|---|---|---|---|---|
| Torso | Linen shirt | Arming doublet | Mail hauberk | 8 |
| Head | Coif liner | — | Mail coif | 5 |
| Arms | — | Padded sleeves | Mail sleeves | 7 |
| Legs | Hose | — | Mail chausses | 5 |
Profile: Medium proficiency. Movement ×0.8. +1 fatigue per 3 rounds. Torso DR 8 reduces an 8-damage blow to 0 — fully absorbed. Strong against slashing, weaker against heavy bludgeoning.
Armored Knight — "The Wall"
Maximum protection for elite warriors. Full plate over mail and padding creates near-impervious defense at the cost of movement and sustained fatigue pressure. Requires Heavy proficiency.
| Body part | Layer 0 | Layer 1 | Layer 3 | Layer 5 | Total DR |
|---|---|---|---|---|---|
| Torso | Shirt | Doublet | Breastplate | 15 | |
| Arms | — | Sleeves | Vambraces | 13 | |
| Legs | Hose | — | Mail chausses | Greaves | 12 |
| Head | Liner | Padded coif | Mail coif | Great helm | 14 |
Profile: Heavy proficiency. Movement ×0.65 (base 6 → 4 hexes). +1 fatigue per 2 rounds. Torso DR 15 fully absorbs most standard blows. The counter is weapon type, sunder pressure, and exposed gaps — not raw damage.
Armor Assembly Guide
A practical assembly flow helps players build legal armor sets instead of guessing at valid combinations.
- Start with underlayers: linen shirts, hose, and other cloth basics protect skin and manage comfort.
- Add padding: gambeson or arming doublet cushions impacts and supports heavier armor.
- Layer rigid protection: leather, mail, composite, or plate depending on budget and expected threats.
- Fill gaps with addons: gorgets, spaulders, besagews, and other small pieces protect vulnerable seams.
- Equip a shield if desired: shields occupy a hand but add substantial defense and active blocking potential.